
Rainbow Wreath Tutorial with Aleene’s Glues
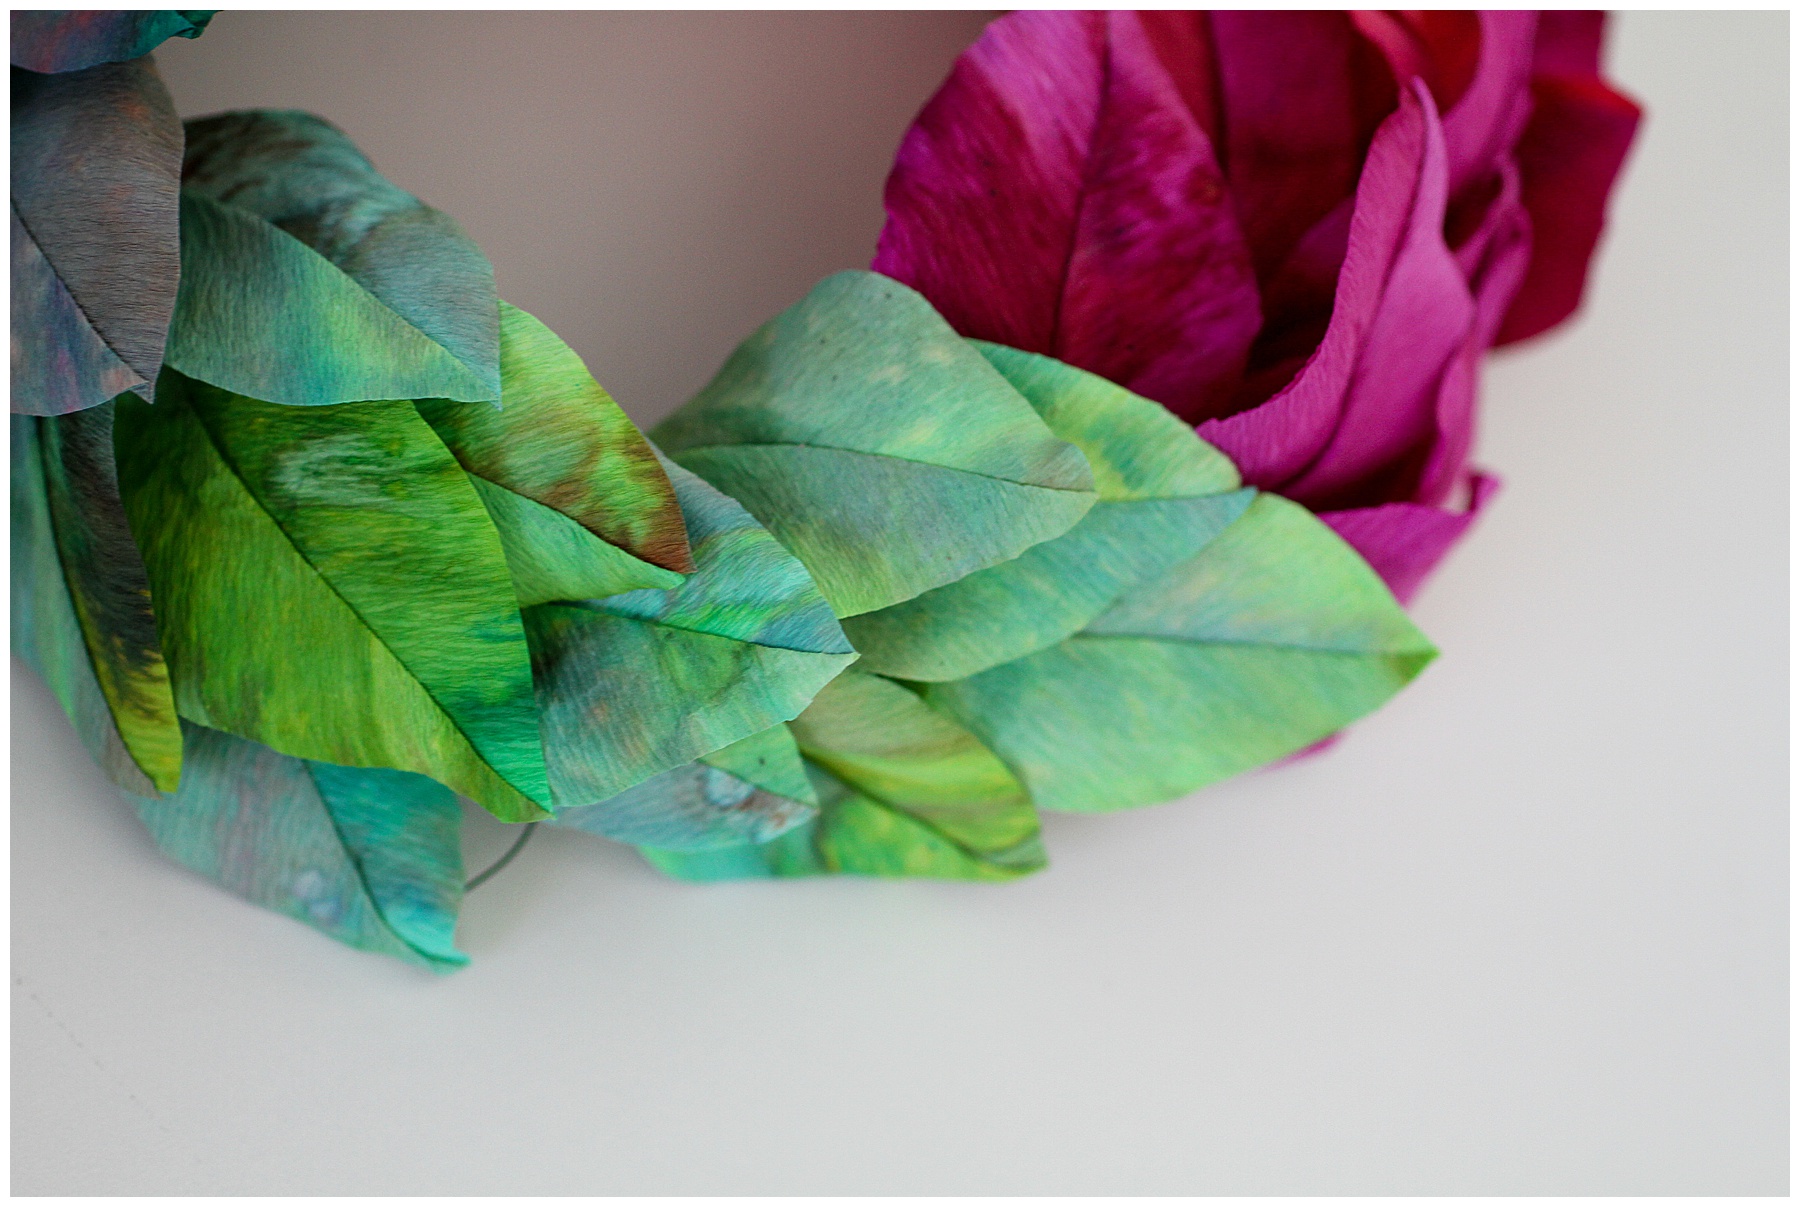
May 14, 2021I’m so excited to share this colorful and happy crepe paper wreath! Whether you’re an experienced paper florist or a newcomer to crepe paper, you’ll have fun making this tutorial your own.
When Aleene’s Glues approached me to try out their Tulip Tie-Dye Kit, I had to say yes. I’m a big fan of their products, and I knew that it would be fun to try something new. This rainbow wreath was the result of my experimentation with their kit. Though you only get five colors (red, orange, green, blue, and purple), the resulting color combinations are endless. If you know your color wheel, you can achieve some really amazing results.
You can also experiment with wire gauge and the wreath base. I made my own base using Kraft-covered wire, but feel free to use a preformed one.
Also be careful not to stretch out the paper as it dries—you’ll need that stretch later on—and make sure to wear the gloves provided in the kit to protect your skin.
Let’s get started!

Supplies:
-
German doublette crepe paper, white
-
Green floral tape
-
Aleene’s Clear Gel Tacky Glue
-
Tulip Tie-Dye Fabric Paint
-
18 gauge Kraft-covered wire
-
24 gauge floral wire
-
Spray bottle filled with water
-
Tray
-
Gloves
-
Scissors


Instructions
COLOR THE PAPER
Step 1: Add color
- Lay the white crepe paper on a tray. Don’t stretch it out; you’ll need that give later on.
- Dampen the paper with water from the spray bottle.
- Apply the Tulip Fabric Paint while wearing gloves. I squirted the colors in five blocks like ladder rungs climbing up the length of the paper, and followed a rainbow pattern. You can get creative here, just keep in mind which colors are side by side and how they’ll look when mixed.
- Spray with more water to help the color run, and apply more paint as needed until the paper is completely colored.
Step 2: Dry the paper
- Let the paper dry completely. You can place it in the sun, or you can microwave really damp paper for 3 minutes. If the paper is still wet, continue microwaving for 1 minute increments, always checking before adding more time.
Note: Remember not to stretch out the paper! It’s supposed to be all wrinkly at this point.

MAKE THE LEAVES
Step 1: Cut the crepe
- Cut the crepe paper into 2.5” strips with the wrinkly lines, or the grain, running across that shorter length. Like a party streamer!
- Fold the strip in half widthwise. Keep folding in half until you are left with a rectangle bundle that is about 3” long.
- Cut all of the folds to make lots of individual squares.
Step 2: Cut a leaf
- Cut a square corner to corner, diagonally.
- Flip the left triangle over and line up the long cut sides to make a kite shape. The grain should run slightly down and away from the center line on both sides.
- Run a line of clear tacky glue up the centerline of one of the triangle pieces. Fold over the other triangle (the shapes should match perfectly). Press the glue firmly to secure the pieces together.
- Open the kite shape and crease it back open, the glued strip at the back folded to one side.
- Trim the outside of the kite shape to make it leaf shaped by rounding off the edges and cleaning up the pointed tip.
Step 3: Add the wire
- Cut a 24 gauge wire in half.
- On the underside of the leaf, run a line of clear tacky glue under one side of the flap.
- Press the wire into the line of glue, and fold the flap over it. The wire should sit snug against the middle line of the leaf.
- Smooth the flap down, flat against the leaf, to securely hold the wire in place.
Step 4: Shape the leaf
- Slightly curl the edges of the leaf toward the back. You can shape with your fingers, or you can gently roll the edge over something the size and shape of a wooden skewer.
- Gently stretch the middle of the leaf along either side of the centerline to help give it that slightly cupped shape.
- Press a wire or other narrow tool along the side of the wire without the seam. This will make it look more like a real vein in a leaf.
Step 5: Repeat
- Repeat the steps 2 through 5 until all squares have been made into leaves.

ASSEMBLE THE WREATH
Step 1: Organize leaves
- Lay out your leaves in the general pattern you’d like to follow. I bunched mine by color, with the multicolored leaves placed between two colors as a bridge to blend them all together. This will also give you a good idea of how big your final wreath will be and how much you should space your leaves.
Step 2: Create wreath frame
- Circle the Kraft-covered wire to your desired size. Mine was about 6 inches across.
- Wrap the overlapping ends together with floral tape.
Step 3: Add leaves
- Place your first leaf over the floral tape. Wrap the wire down and around the frame to secure in place.
- Place the next leaf over the first, but down the frame just a little. Wrap the wire.
- Continue placing leaves. To save time, wrap a wire a couple times, then wrap a couple more times with the next wire, and on and on. You can also place two leaves at the same time and wrap together. Keep an eye on spacing so that your leaves are evenly spaced around the entire wreath.
- Trim off wire ends poking from the back.
Step 4: Add finishing touches
- Fiddle with how the leaves lay until you achieve the desired look. I curled some slightly toward the center and outward to give it a fuller look.

I’d love to see what you create or answer any questions you have! Feel free to DM me on Instagram @pinkandposey or email me at [email protected].
Interested in learning more about the world of paper flowers?
Sign up for my personal newsletter
Sign up for the lates news on what I am up to, along with in-person workshops and other collaborations.
I respect your privacy and will never share your email and contact information with any third party without your permission.


